The following text, pictures and videos document the different work required since we started our vineyard in 2015 and expanded it since.
We’ll be adding more material to this page as this ‘vineyard – and soon to be winery tasting room – adventure’ continues – so check back from time to time!
For more information about starting a vineyard and growing grapes, visit Cornell’s excellent info
We started our vineyard project at least a year earlier than planned because of the excellent assistance from the Finger Lakes Grapes Project personal.
For a new vineyard, Cornell has 3 pages on preparing a site:
2 years pre-planting
1 year pre-planting
Year of planting
And the ‘year of planting’ page has links to more info on vineyard design & layout, planting methods, plant nutrient and soil testing/treatment, weed control, 1st year care, water needs, insect & disease management, and vine/canopy care in subsequent year.
Field prep |
|
| To expand our vineyard in 2020 we first had to remove rows of trees between two fields. The ‘middle’ row to simply make the vineyard field continuous. The trees on the right (east side, facing Cayuga lake below) to enable free flow of air thru the vineyard. A solid row of trees on the ‘downhill’ side of a vineyard can ‘trap’, or ‘inhibit’, the flow of cold air down the hill on a cold night. This can result in enough lower temperatures near that row of trees to significantly increase the risk of graft union damage on the colder nights. This is a picture before that work started. However, depending on the condition of a field before planting vines, other prep work could have been necessary. Because the field between the trees was farmed for field crops for literally decades previously, and the soil well cared for in terms of fertilization, soil treatments weren’t required. Also, if the field hadn’t been farmed previously, various weeds and small brush probably would have become established, requiring more clearing and planting of cover crops for one or two years before planting. | 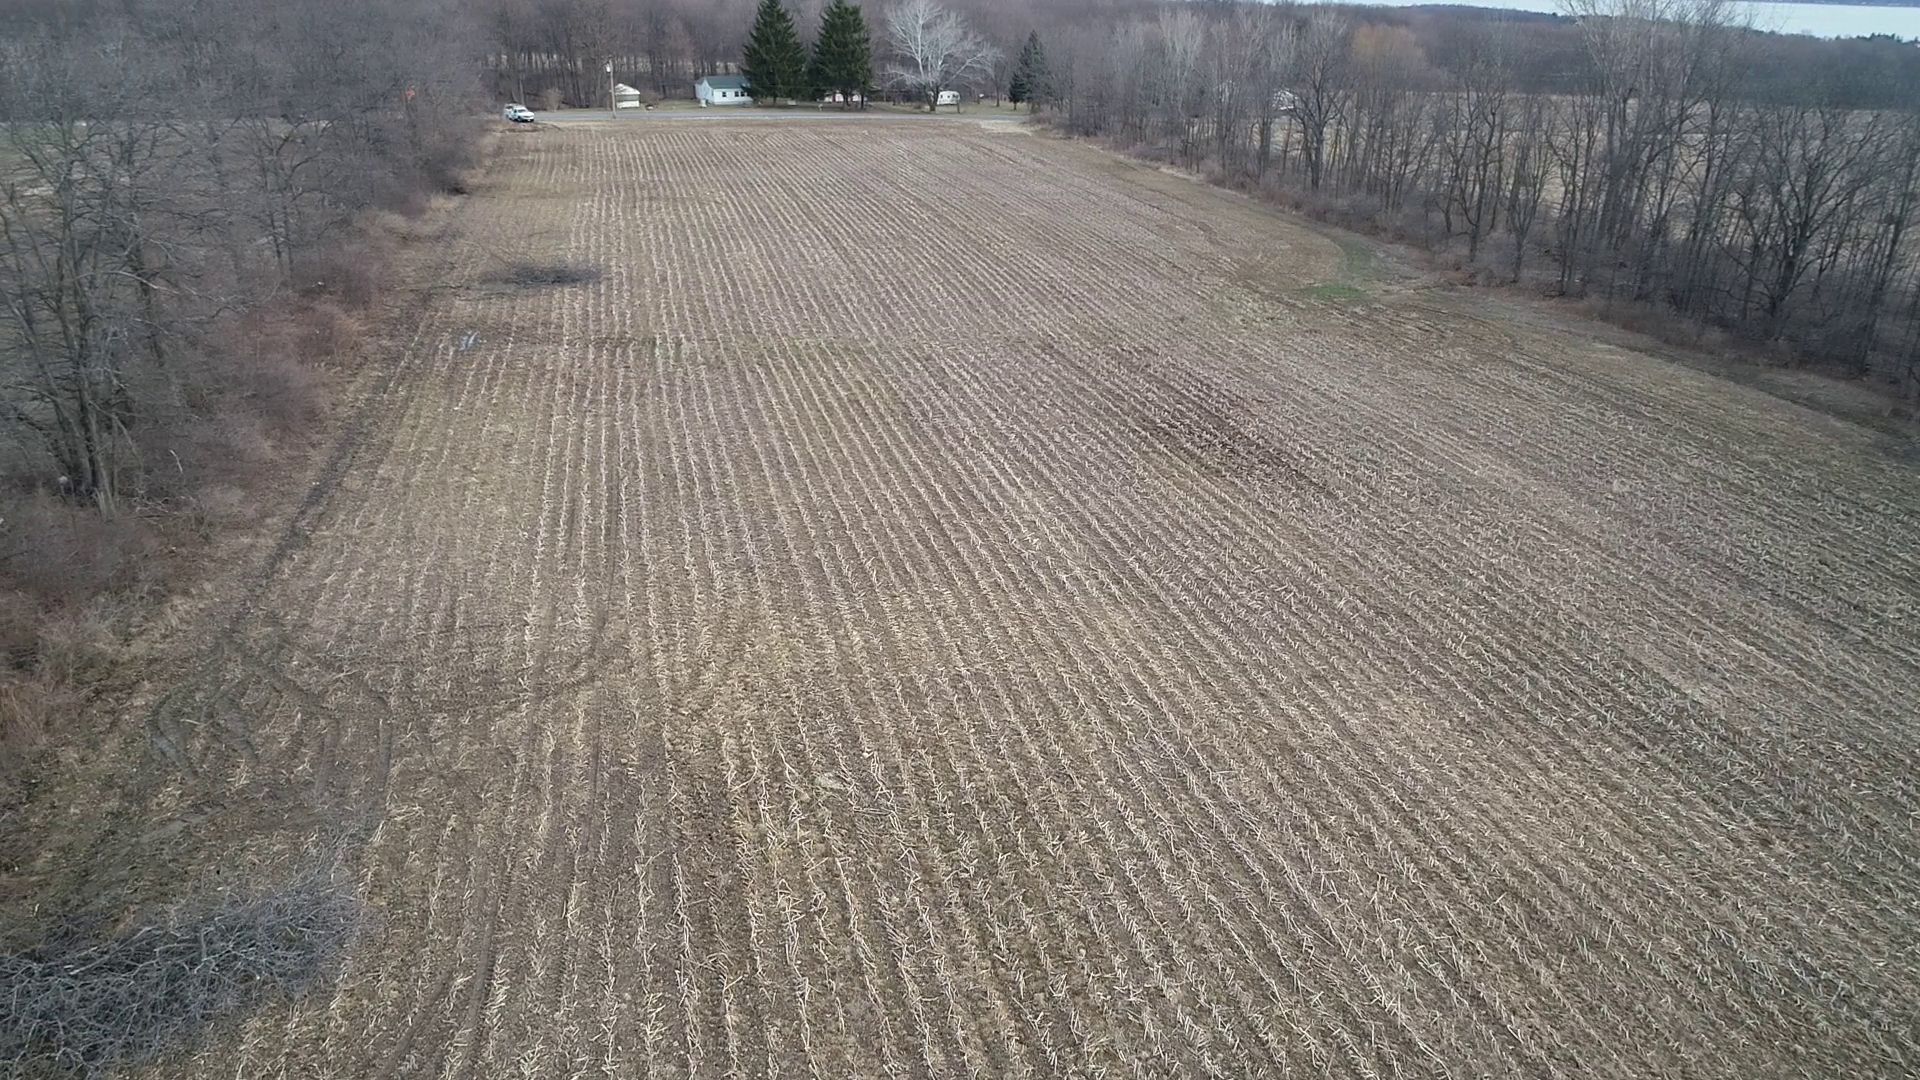 |
| A contractor used a large excavator to knock the trees over and pull out the stumps. Afterwards a bulldozer leveled the ground where the trees were. | |
| The trees were all cut up harvested to be used for firewood or sold for lumber. | 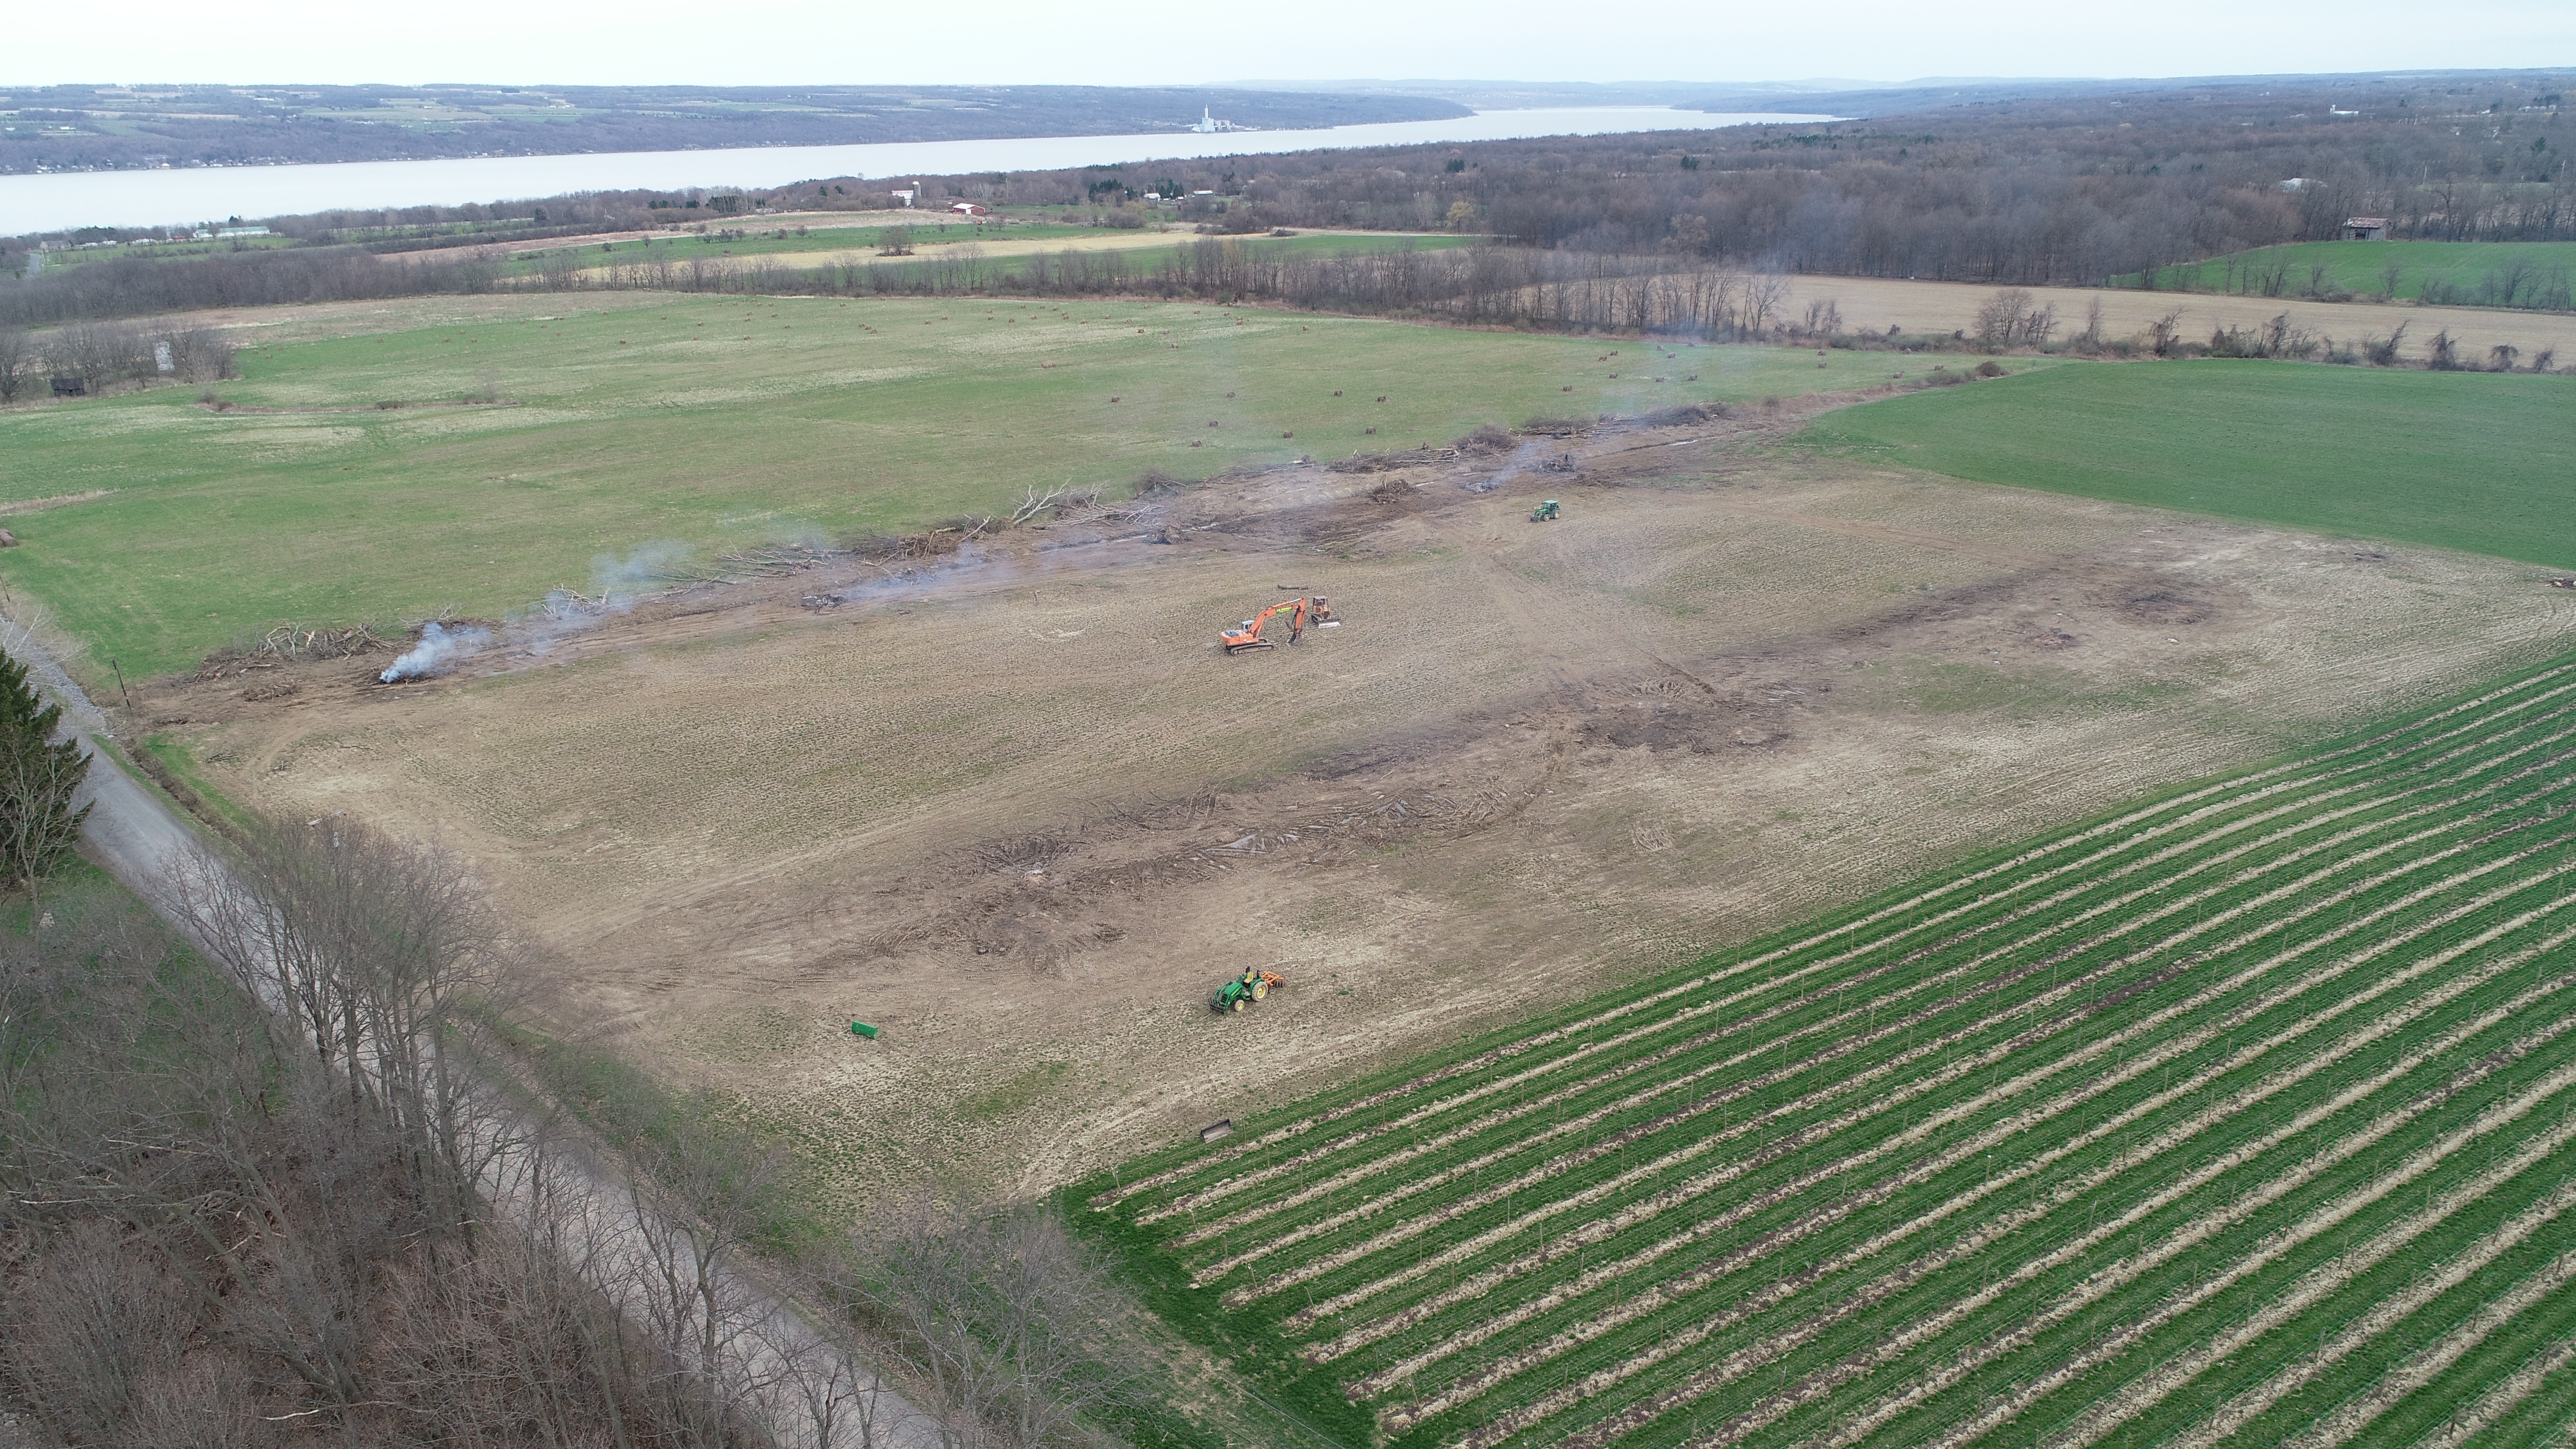 |
| The saying is ‘vines don’t like wet feet’, so after the trees were cleared, extra drain lines are installed at various spacings depending on the nature of the soil and other factors. The big tractor opens a trench and pulls the drain tile in. The tile’s about 3’ or so down. The tractor is GPS steered (to get uniform spacing) and GPS depth control (to maintain pitch of the drain line independently of ground variation) | |
Planting |
|
| Although this video is from our 2016 planting, it gives a good view of how the planter works. The big rotating 3 armed thing grabs a vine from the revolving tracks that the guys put the vines in. It rotates down into the trench opened by the planter, lets go of the vine, and the planter closes in the trench. GPS steered so rows are all straight and parallel … facilitating all the mechanical work when the vines grow up. Planting costs about $1/vine. They can do like 5,000 or more day. | |
| In our area vines are planted in mid-late May. The ‘baby vines’ are 1 year old, raised by various nurseries in NYS and California. All ours came from NYS nurseries. The baby vines are ‘bare little stumps’ when planted. Over the next 2-3 weeks small leaves start opening up from the tiny buds. | |
Watering |
|
| If there’s not enough rain when the babies are young and the roots are developing, they need to be watered so the plant gets enough moisture and the graft union stays healthy. In this video there’s a 275 gallon tank in the back of the Kubota. The water flows by gravity thru the ‘wands’ as we lower them by each plant, putting ½-1 gallon on each plant. Some years we have to do this, some years not. Only once last year (2020) on the new 5 acres. Not at all this year (2021). | |
Putting up trellis |
|
| Posts have to be installed to support the wires that make the trellis that the vines grow on and support the weight of the grapes. | |
| In 2022 we switched to using metal posts that come ‘pre-notched’ for wire placement every 6”. This eliminates work required to staple wires to wood posts, and greatly facilitates the ability to move catch wires during the growing season. | |
Spraying |
|
| Wine grapes are prone to getting various mildew and other diseases on the leaves and/or the grapes themselves. Preventative sprays are done during May-September to keep them from starting, as eliminating them if they get started is much harder (and more expensive). All materials sprayed are regulated by the NYS DEC and have specified ‘pre-harvest intervals’ – meaning they can’t be sprayed less than the specified number of days before the harvest. And each spray has a minimum number of days after the spray before hand work in the vines is allowed. The ‘tunnel’ sprayer in the video was bought because it has much less overspray than other designs … which means less stuff that floats around and lands on the ground instead of the vines. Better for environment and saves money on chemicals. And gets better coverage on the vines which means less disease risk and I don’t need to spray as often. | |
Mechanical Weeding |
|
| My vineyard rows are 9’ apart. About 6’ in the middle between them is mowed grass. About 3’ directly under the vines needs to be kept free of weeds for various reasons. The options are herbicides or mechanical cultivation. I try to do only mechanical weed control … cultivation. These videos shows some methods. | |
Leaf removal |
|
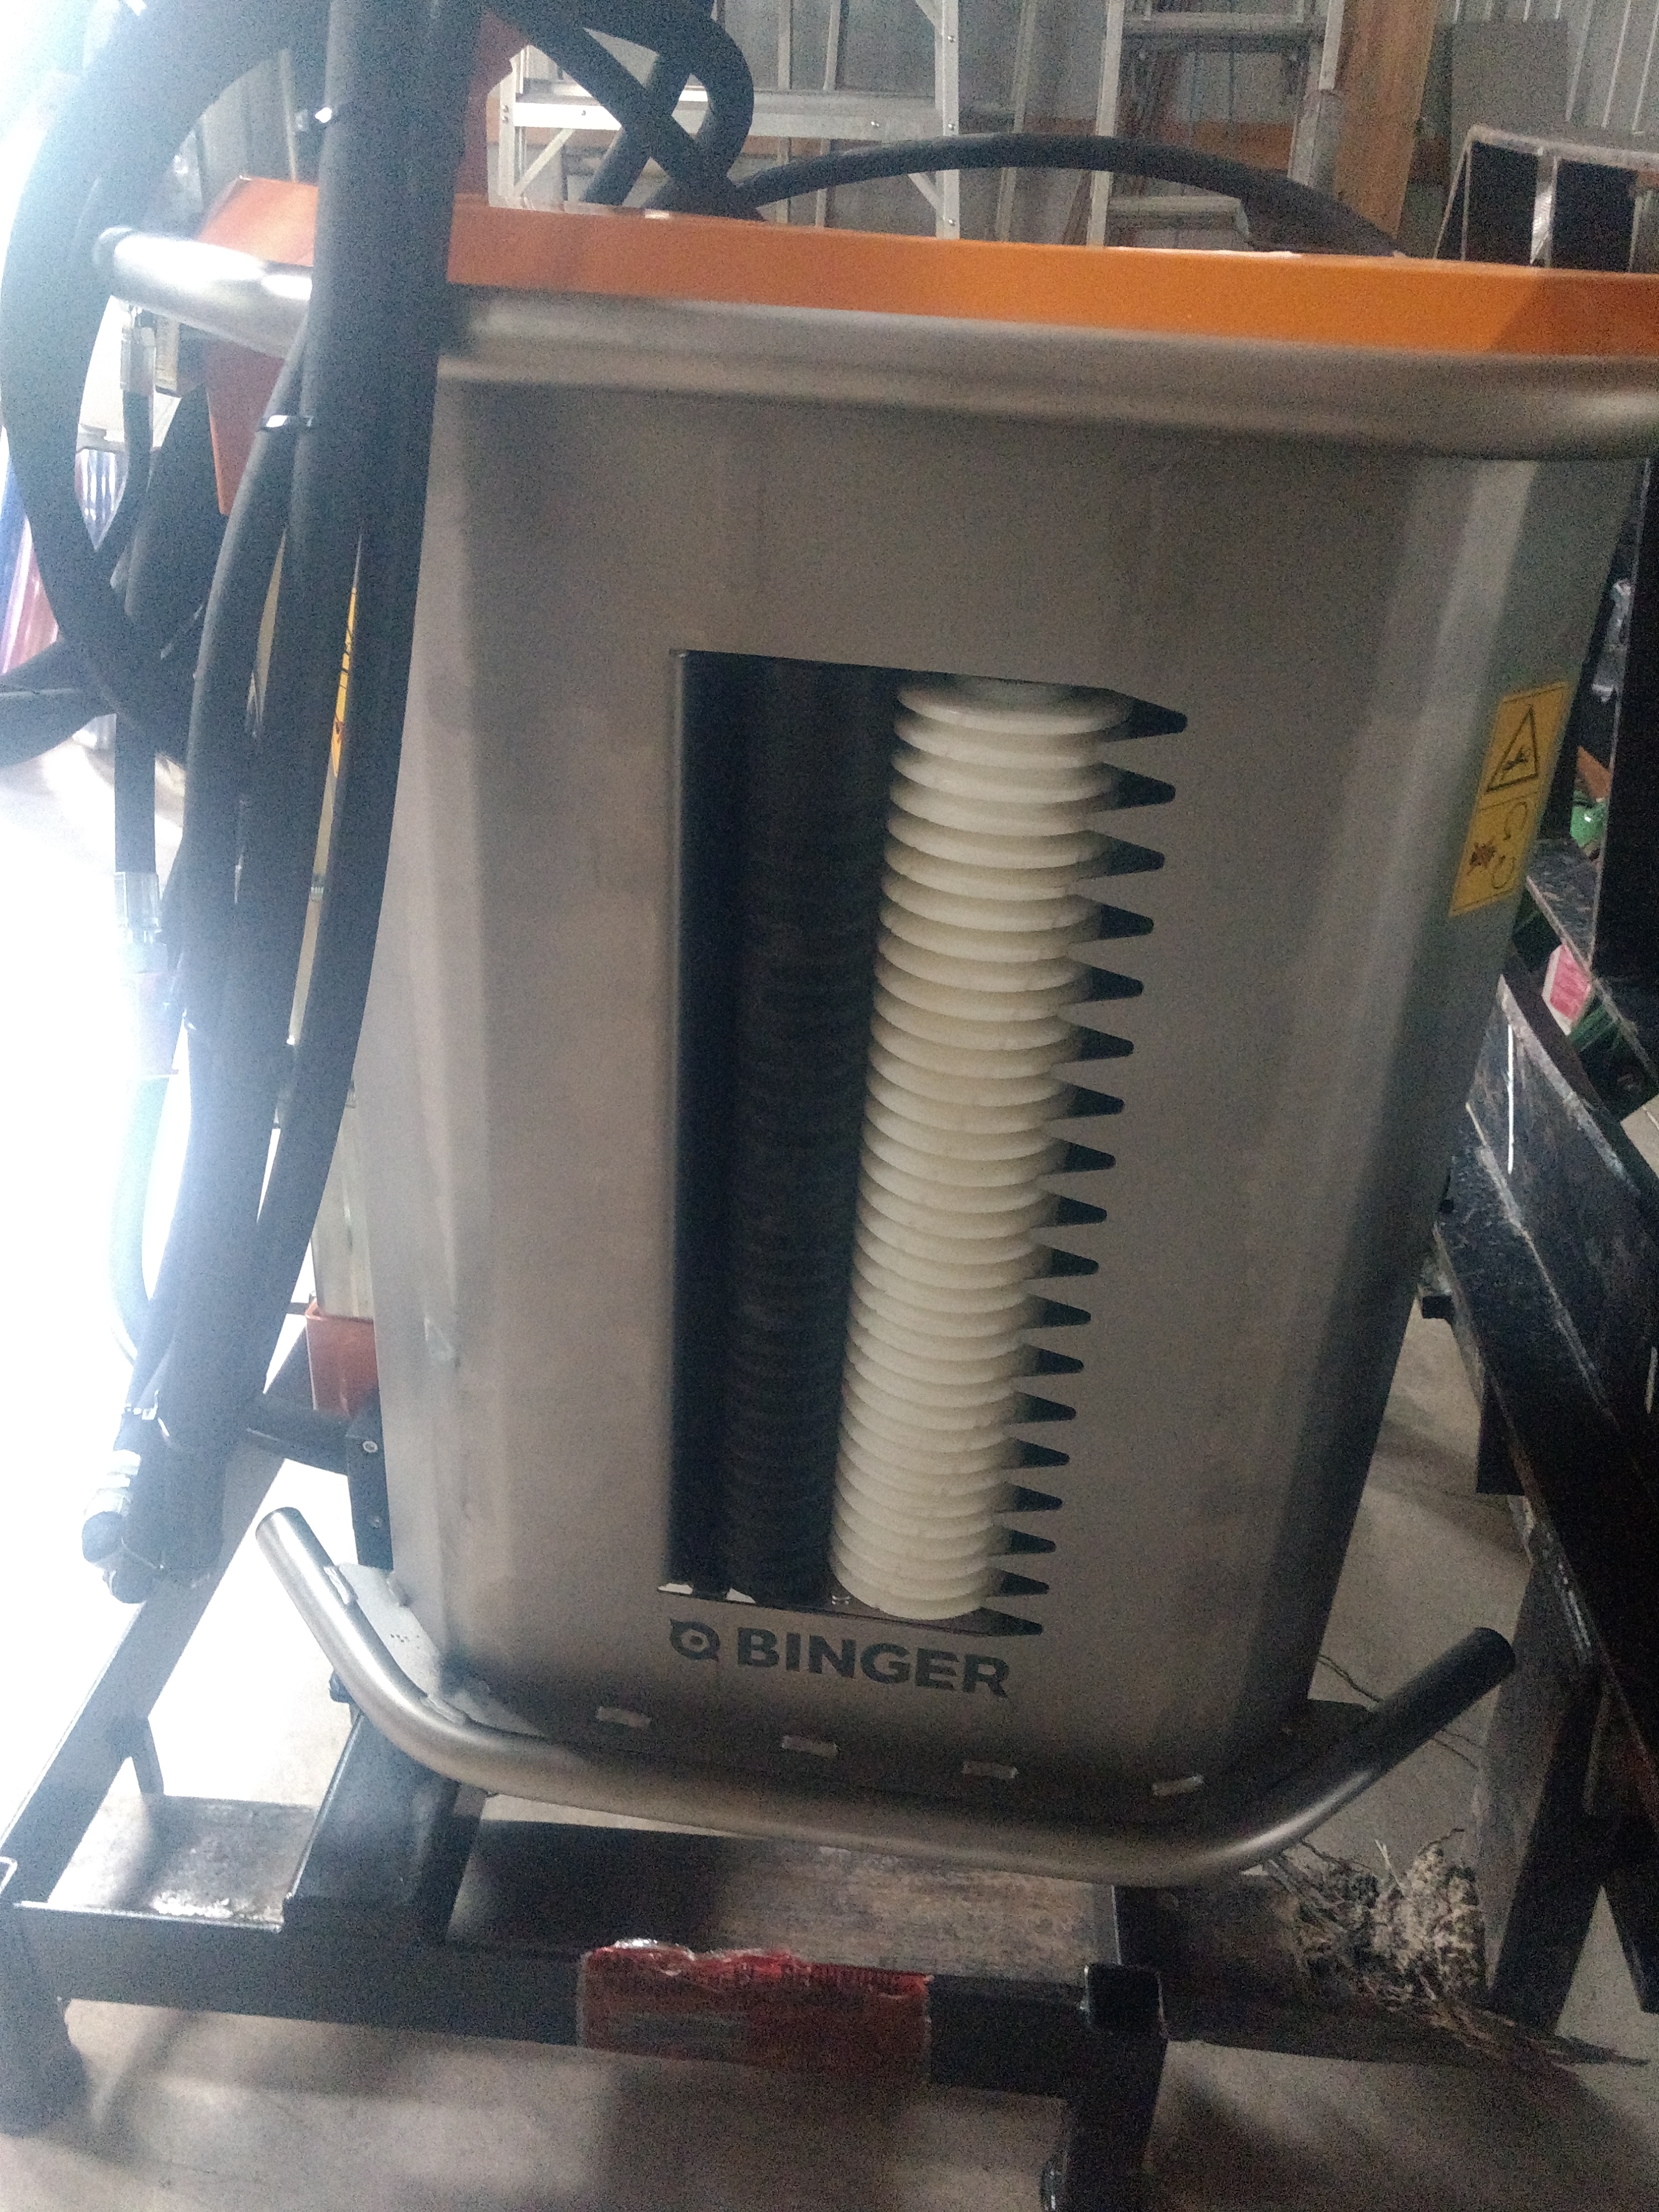
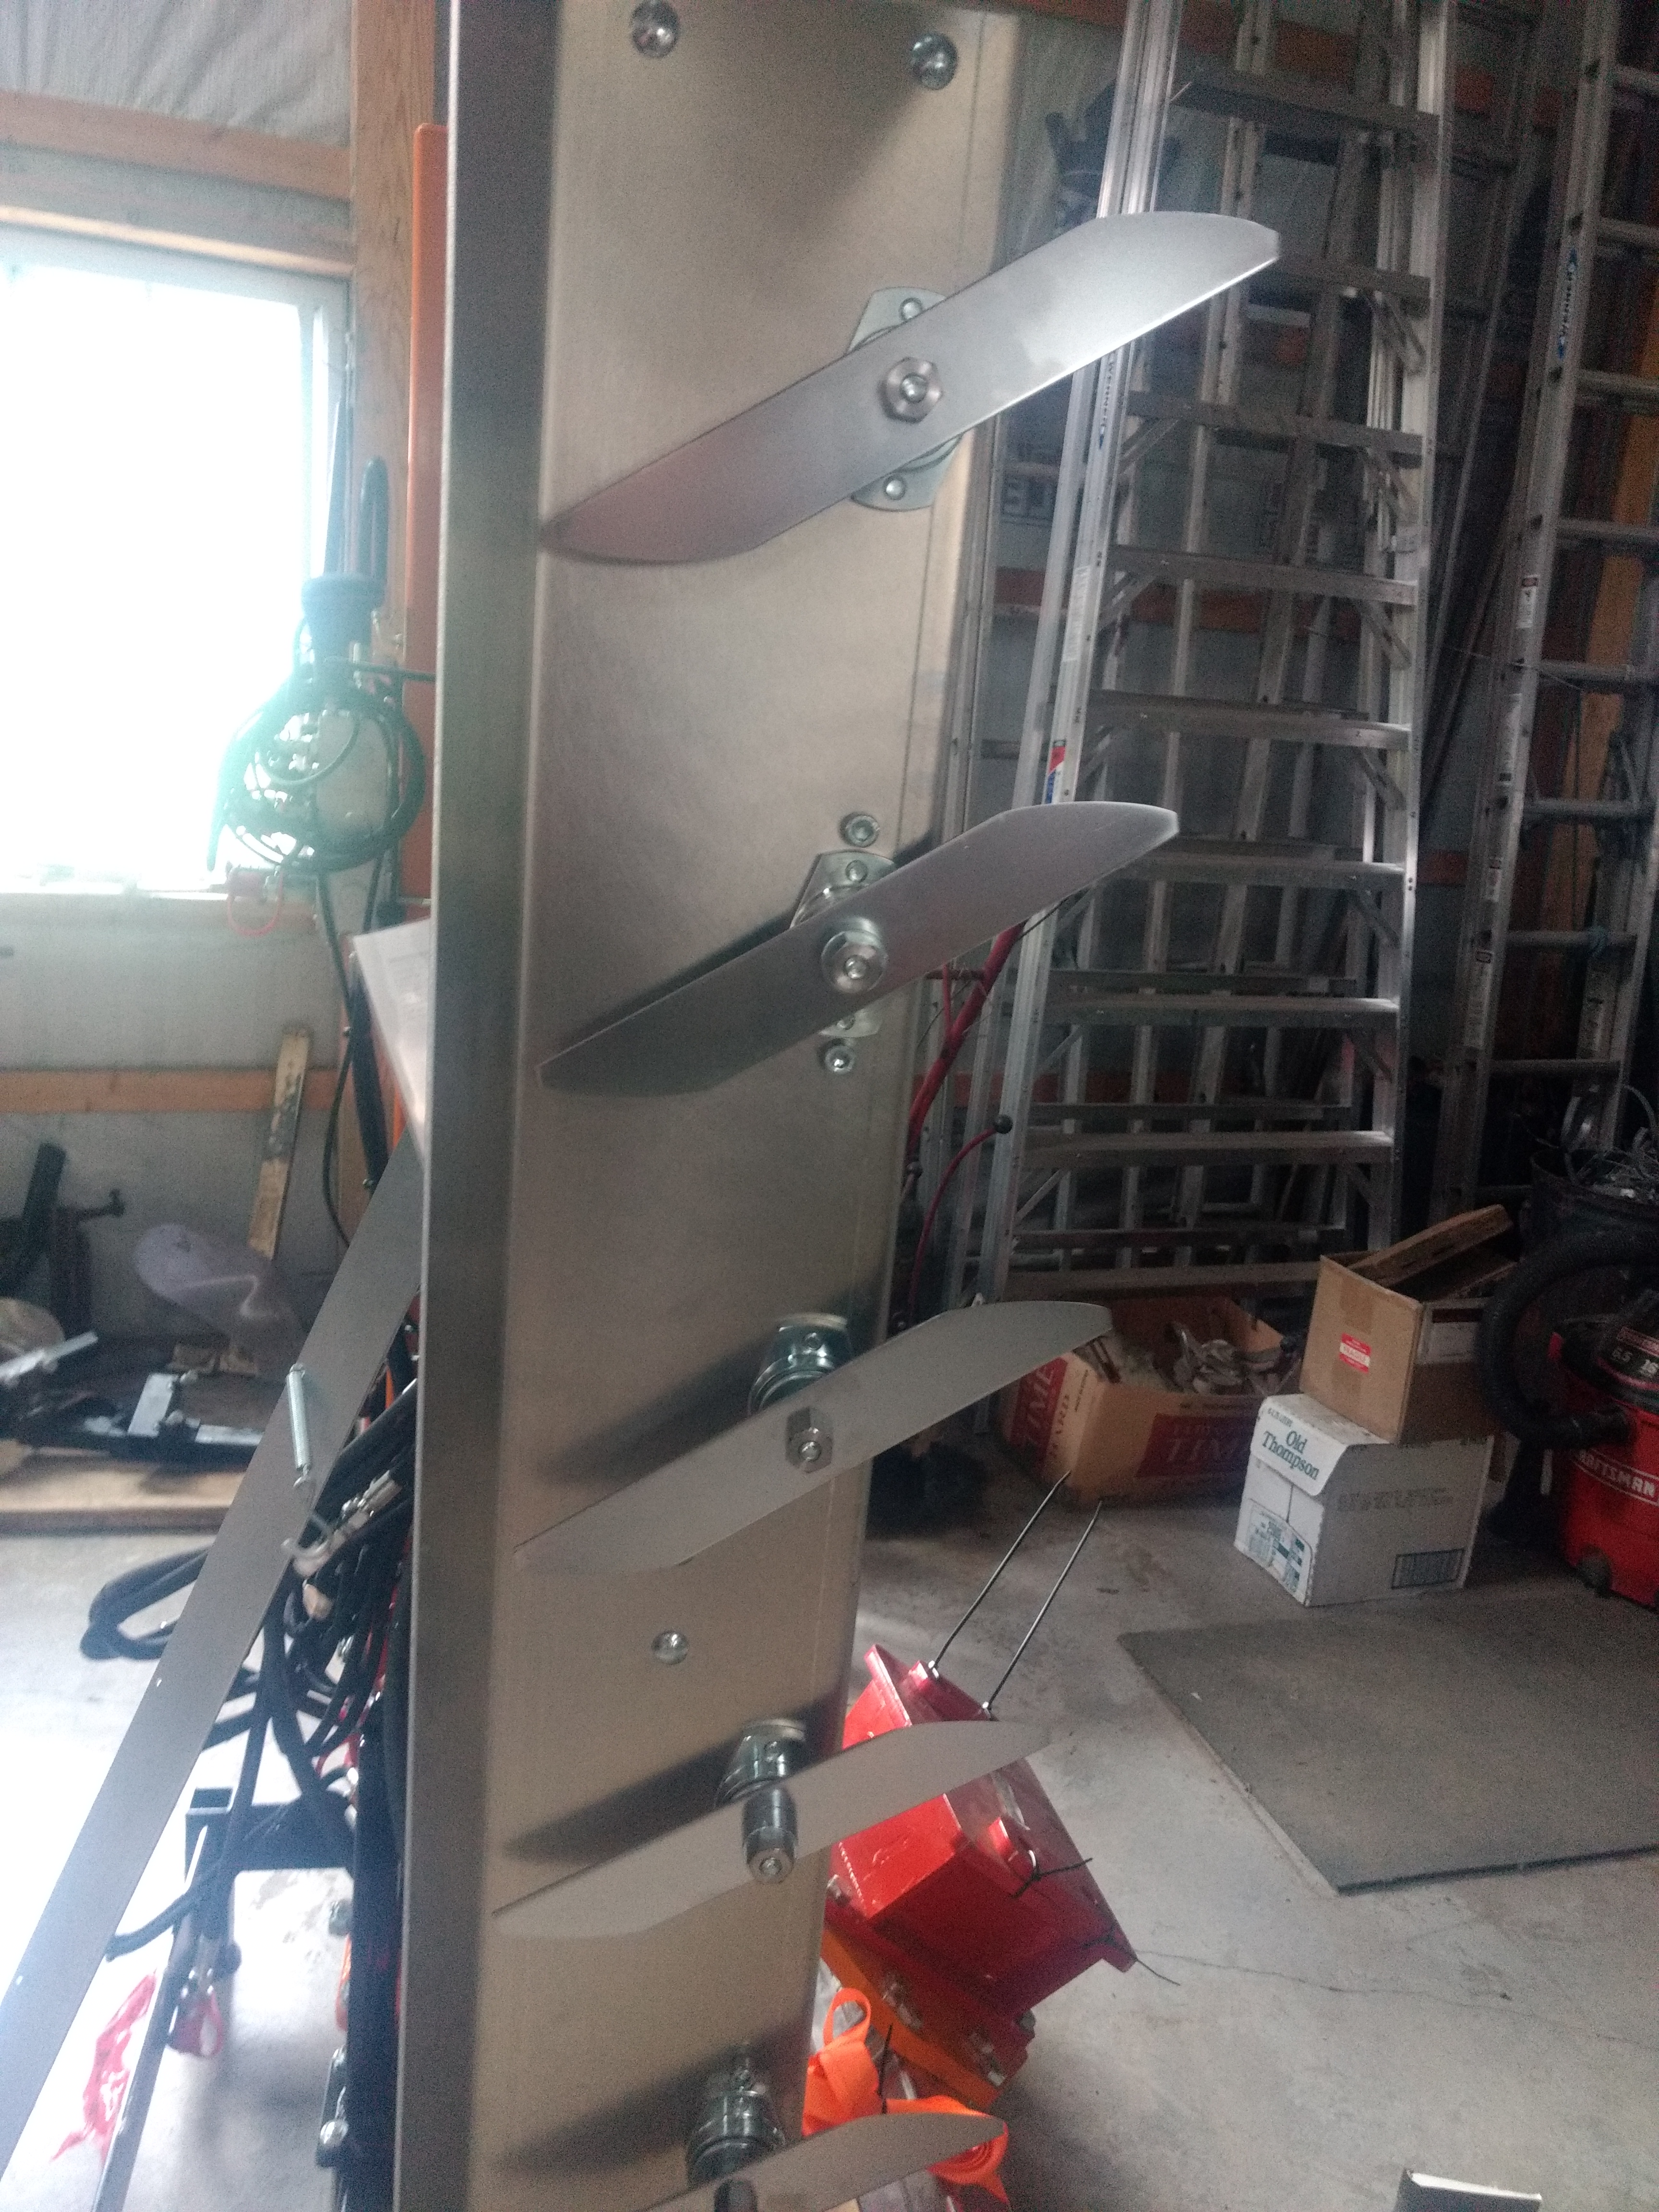
| The leaves near the grape clusters … called the ‘fruit zone’ (where the clusters hang) … are removed to improve air flow (dry quicker after rain or dew; drier means less disease risk). It also exposes them to sun (mature better) and allows better spray penetration into the clusters (prevent molds/mildews). Leaf removal is done once/year, when the grape ‘berries’ are very small. In the adjacent image you’ll see the actual leaf remover. If you look at the image you’ll see a white and dark vertical cylinder. They’re each driven by a hydraulic motor, and rotate in opposite directions. Behind them is a fan that creates suction. As you drive close to the leaves; the fan’s suction pulls the leaves into the rollers, which ‘grab’ them, rip them off the vines and they go into the fan, which shreds them and blows them out in front of the tractor. This operation is done on both sides of the vine for most varieties. The leaf remover and hedge trimmer shown below use the same frame mounted on front of tractor. |
 |
Hedging and trimming |
|
| The vines will grow taller than the trellis wires that support them. If they get too tall, and if they hang out of the trellis wires, they will fall over and hang in front of the leaves and grape clusters below. This prevents the sprays from reaching everywhere it’s needed. It can also delaying the vines/clusters from drying out after a heavy dew or rain. That moisture can significantly increase the risk of disease. It gets done 3 maybe 4 times each year. An acre of vines is just under one mile. So driving at 3-4 mph, it will take about 6 hrs. to do all 18 acres. Note – this video was taken in my neighbors vineyard – we help each other sometimes! Below are a couple pictures of the hedger/trimmer and blades. | |
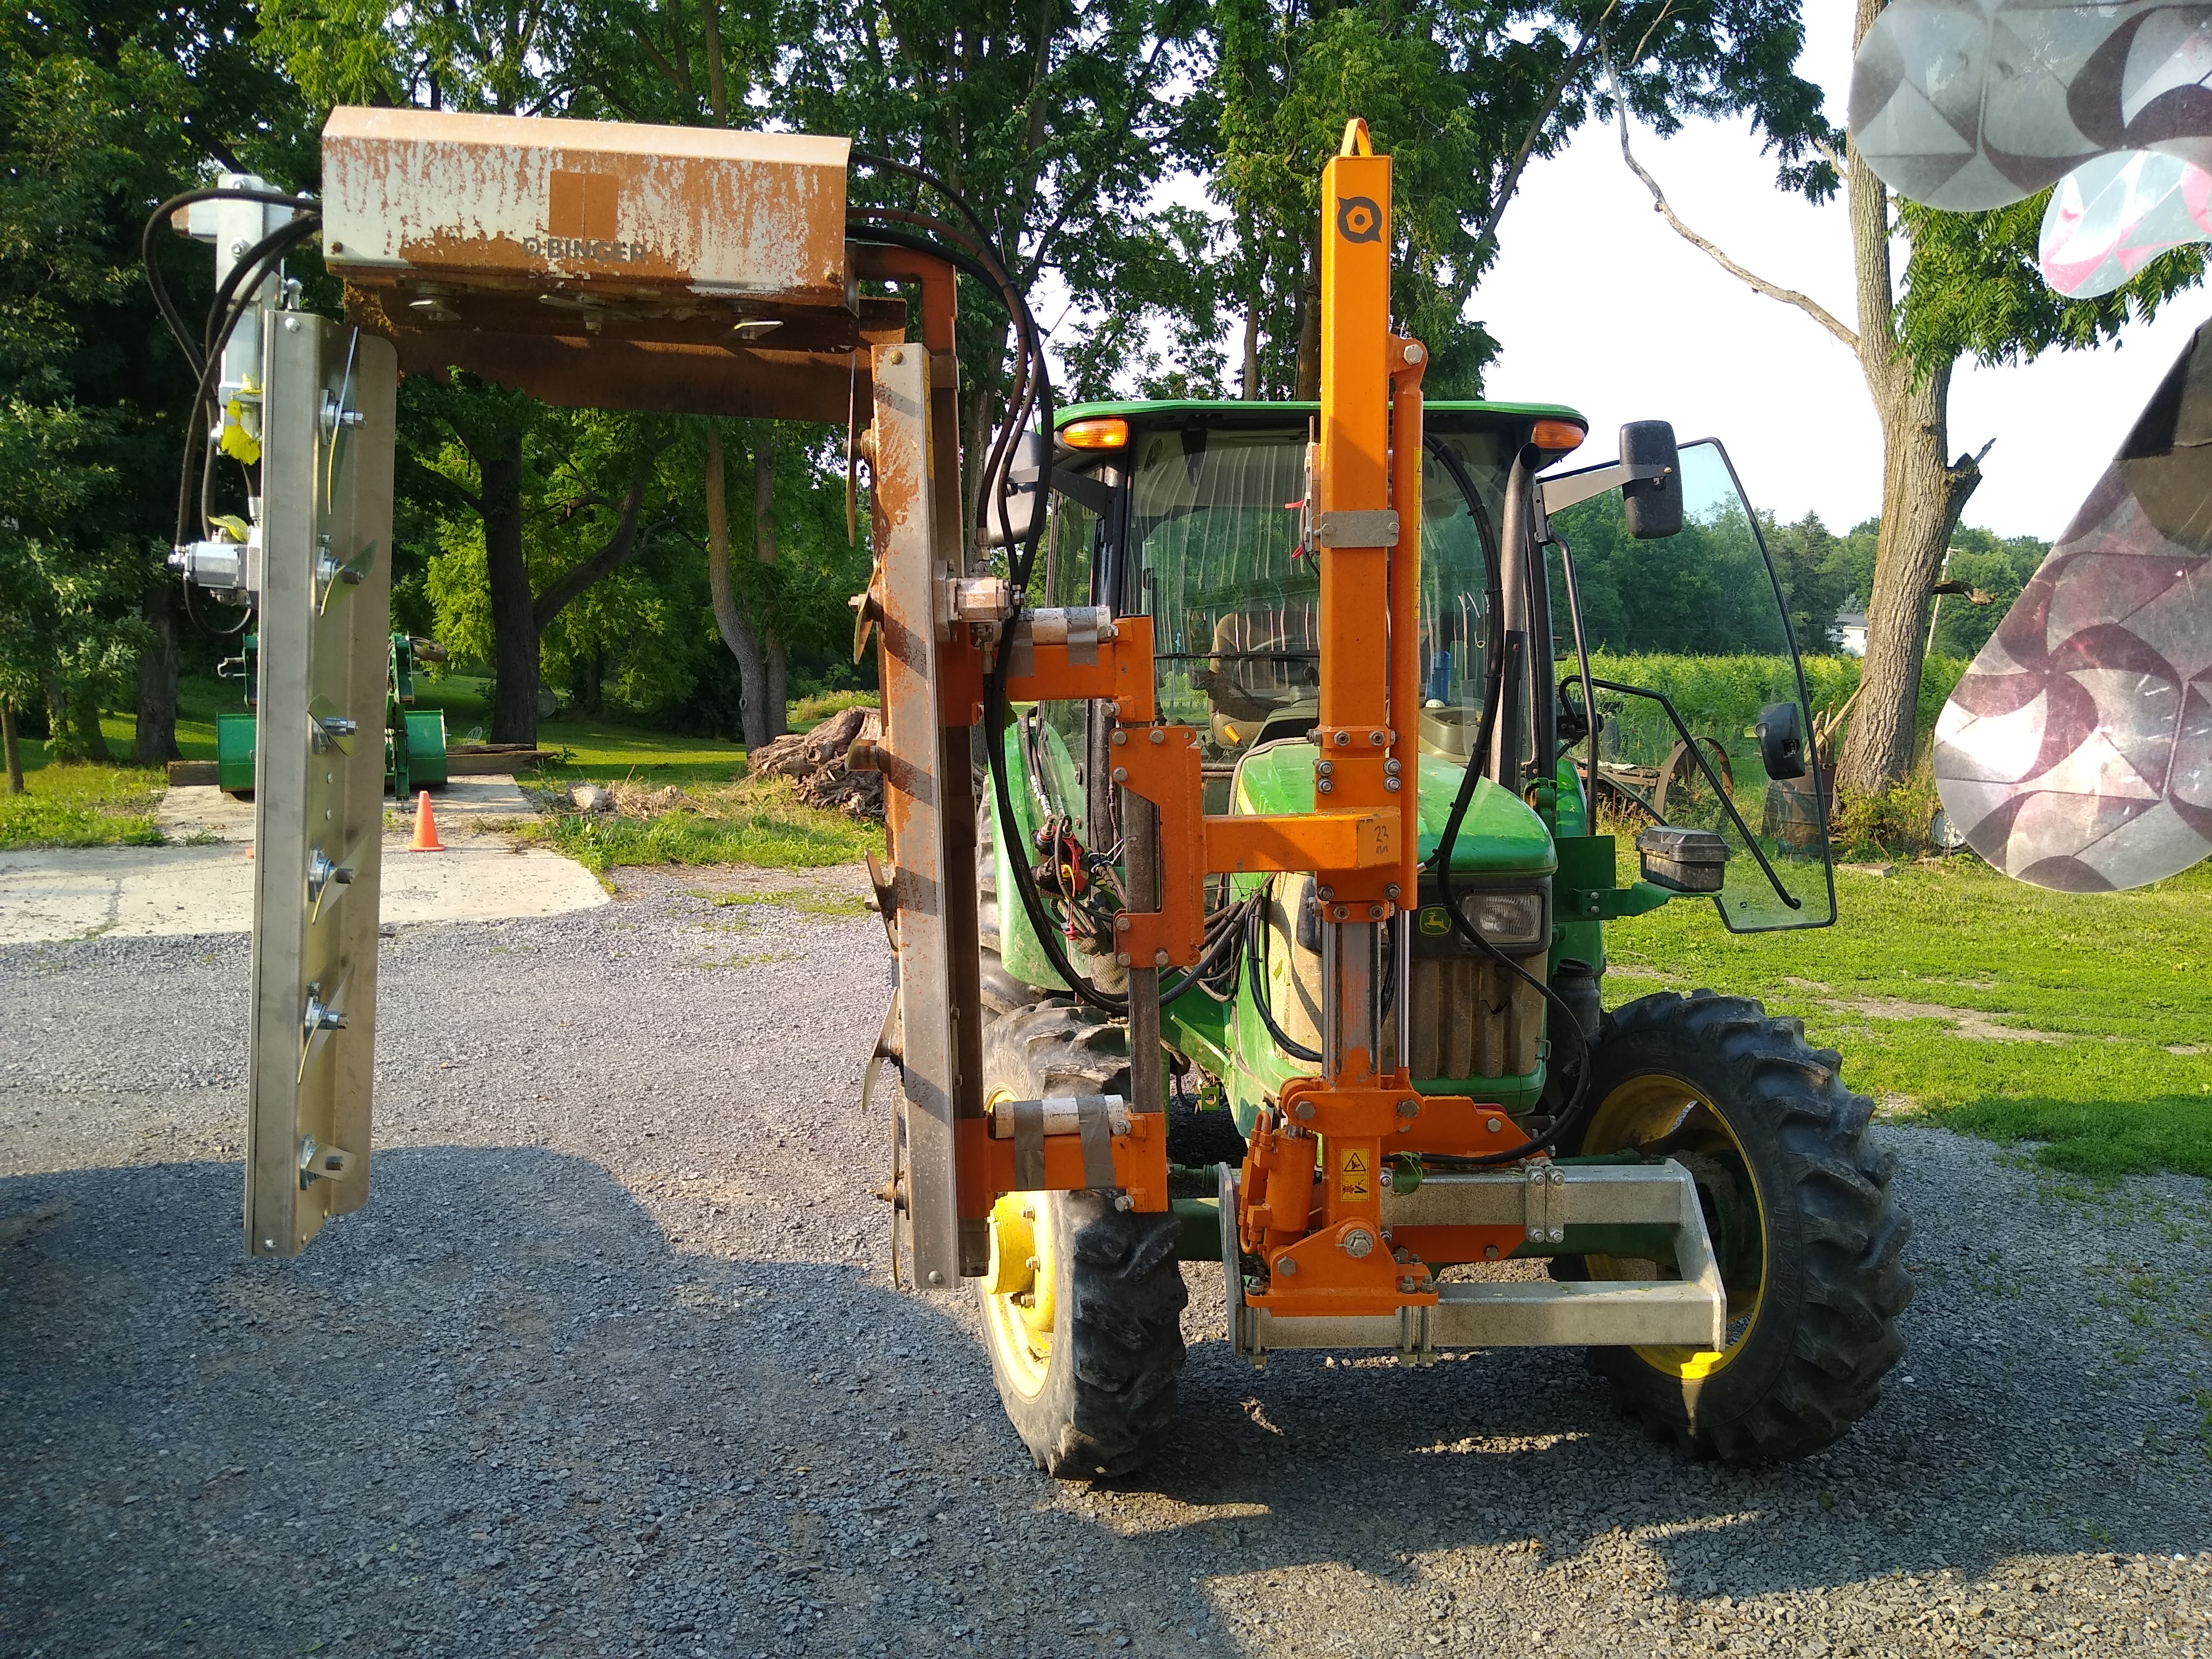  |
Since this video was made I bought ‘the other side’ so it trims both sides and top in one pass … cuts the time in half. It gets done 3 maybe 4 times each year. An acre of vines is just under one mile. So driving at 3-4 mph, it will take about 6 hrs. to do all 18 acres … 12 hrs. w/o the 2nd side. Below are a couple pictures of the hedger/trimmer and blades. |
Animal Pest Control |
|
| Various animals like to eat grapes too! Birds are the greatest risk, as a large flock of starlings or grackles can literally eat/damage tons of fruit in a couple days. And they know when the grapes are getting ripe and sweet. There are various ‘mechanical’ ways to protect the grapes from birds. One is netting that is attached to the trellis above the clusters, lowered down over them when needed, then put back up just before harvest. Time consuming/labor intensive. Also used are propane ‘cannons’ on timers that make a large noise intermittently, scaring the birds away. Also large things called ‘tube men’ or ‘skydancers’ like you see at car dealer lots and other places. They require a large fan to make them stand up and blow around. Both the cannons and skydancers need to be relocated periodically as the birds get used to them. In 2017 I discovered a company called ‘Bird Control Group’ out of Europe that has sold a laser light based system in various commercial (think airports and large warehouses) applications, and some agricultural applications. Although we can’t see a laser beam in the daylight (only the dot when the beam hits something), birds can see the beam and it scares them away. A laser light device is mounted on a pole, and another on the barn by the vineyard. The unit is programmed to move the beam around the vineyard in somewhat random sequences. It runs from dawn to dusk, and keeps nearly all birds away. We were the first vineyard in the Finger Lakes to install this system. Other animal pests include deer, turkeys, and raccoons. They all seem to enjoy the grapes as they get close to fully ripe. For the deer I use a commercial ‘deer be gone’ product. Spray a mixture on the grass around the entire perimeter of the vineyard – on the ends of the row and into the first few feet of the vines. And then along the ground and bottom of vines at the two ends. I do this a few weeks before the grapes become ‘attractive’ to the deer. The goal with deer is to stop them from developing the habit of entering your vineyard. For raccoon I’ve tried some smelly repellents, but they don’t work well. Now I set out live traps a few weeks ahead, and then exterminate them if/when trapped. Left over chicken, and paste type (canned) cat of dog food is a good bait, especially fish flavored. I don’t believe I had a problem (yet) with turkeys. |
|
Harvesting |
|
| The mechanical harvester really shakes the vines, causing the grapes to fall off the clusters onto conveyors in the harvest that take them up to a bin from which they’re transferred out the chute on the side of the elevator and down into the bin pulled on a trailer in the adjacent row. Someone rides on the trailer to remove things that sometimes get ‘harvested’ at the same time … pieces of vine, birds nests, etc. Whatever’s not removed during harvest is removed at the winery as the berries are pressed for the juice, the juice filtered, etc. Pam loves to do the ‘bin diving’! | |
| Some varieties are harvested by hand. Seasonal workers cut the clusters from the vines and drop them into plastic totes that hold ~30 pounds. Those totes are then collected by trailer or Kubota and dumped into larger bins and trucked to the winery. In this video Pam is driving the tractor with the large bin on front end loader forks, while Fred and a friend Tom pick the totes up and dump them in the bin. They drop the totes back on the ground and we come thru later, collect them and wash them – and store until the next harvest. | 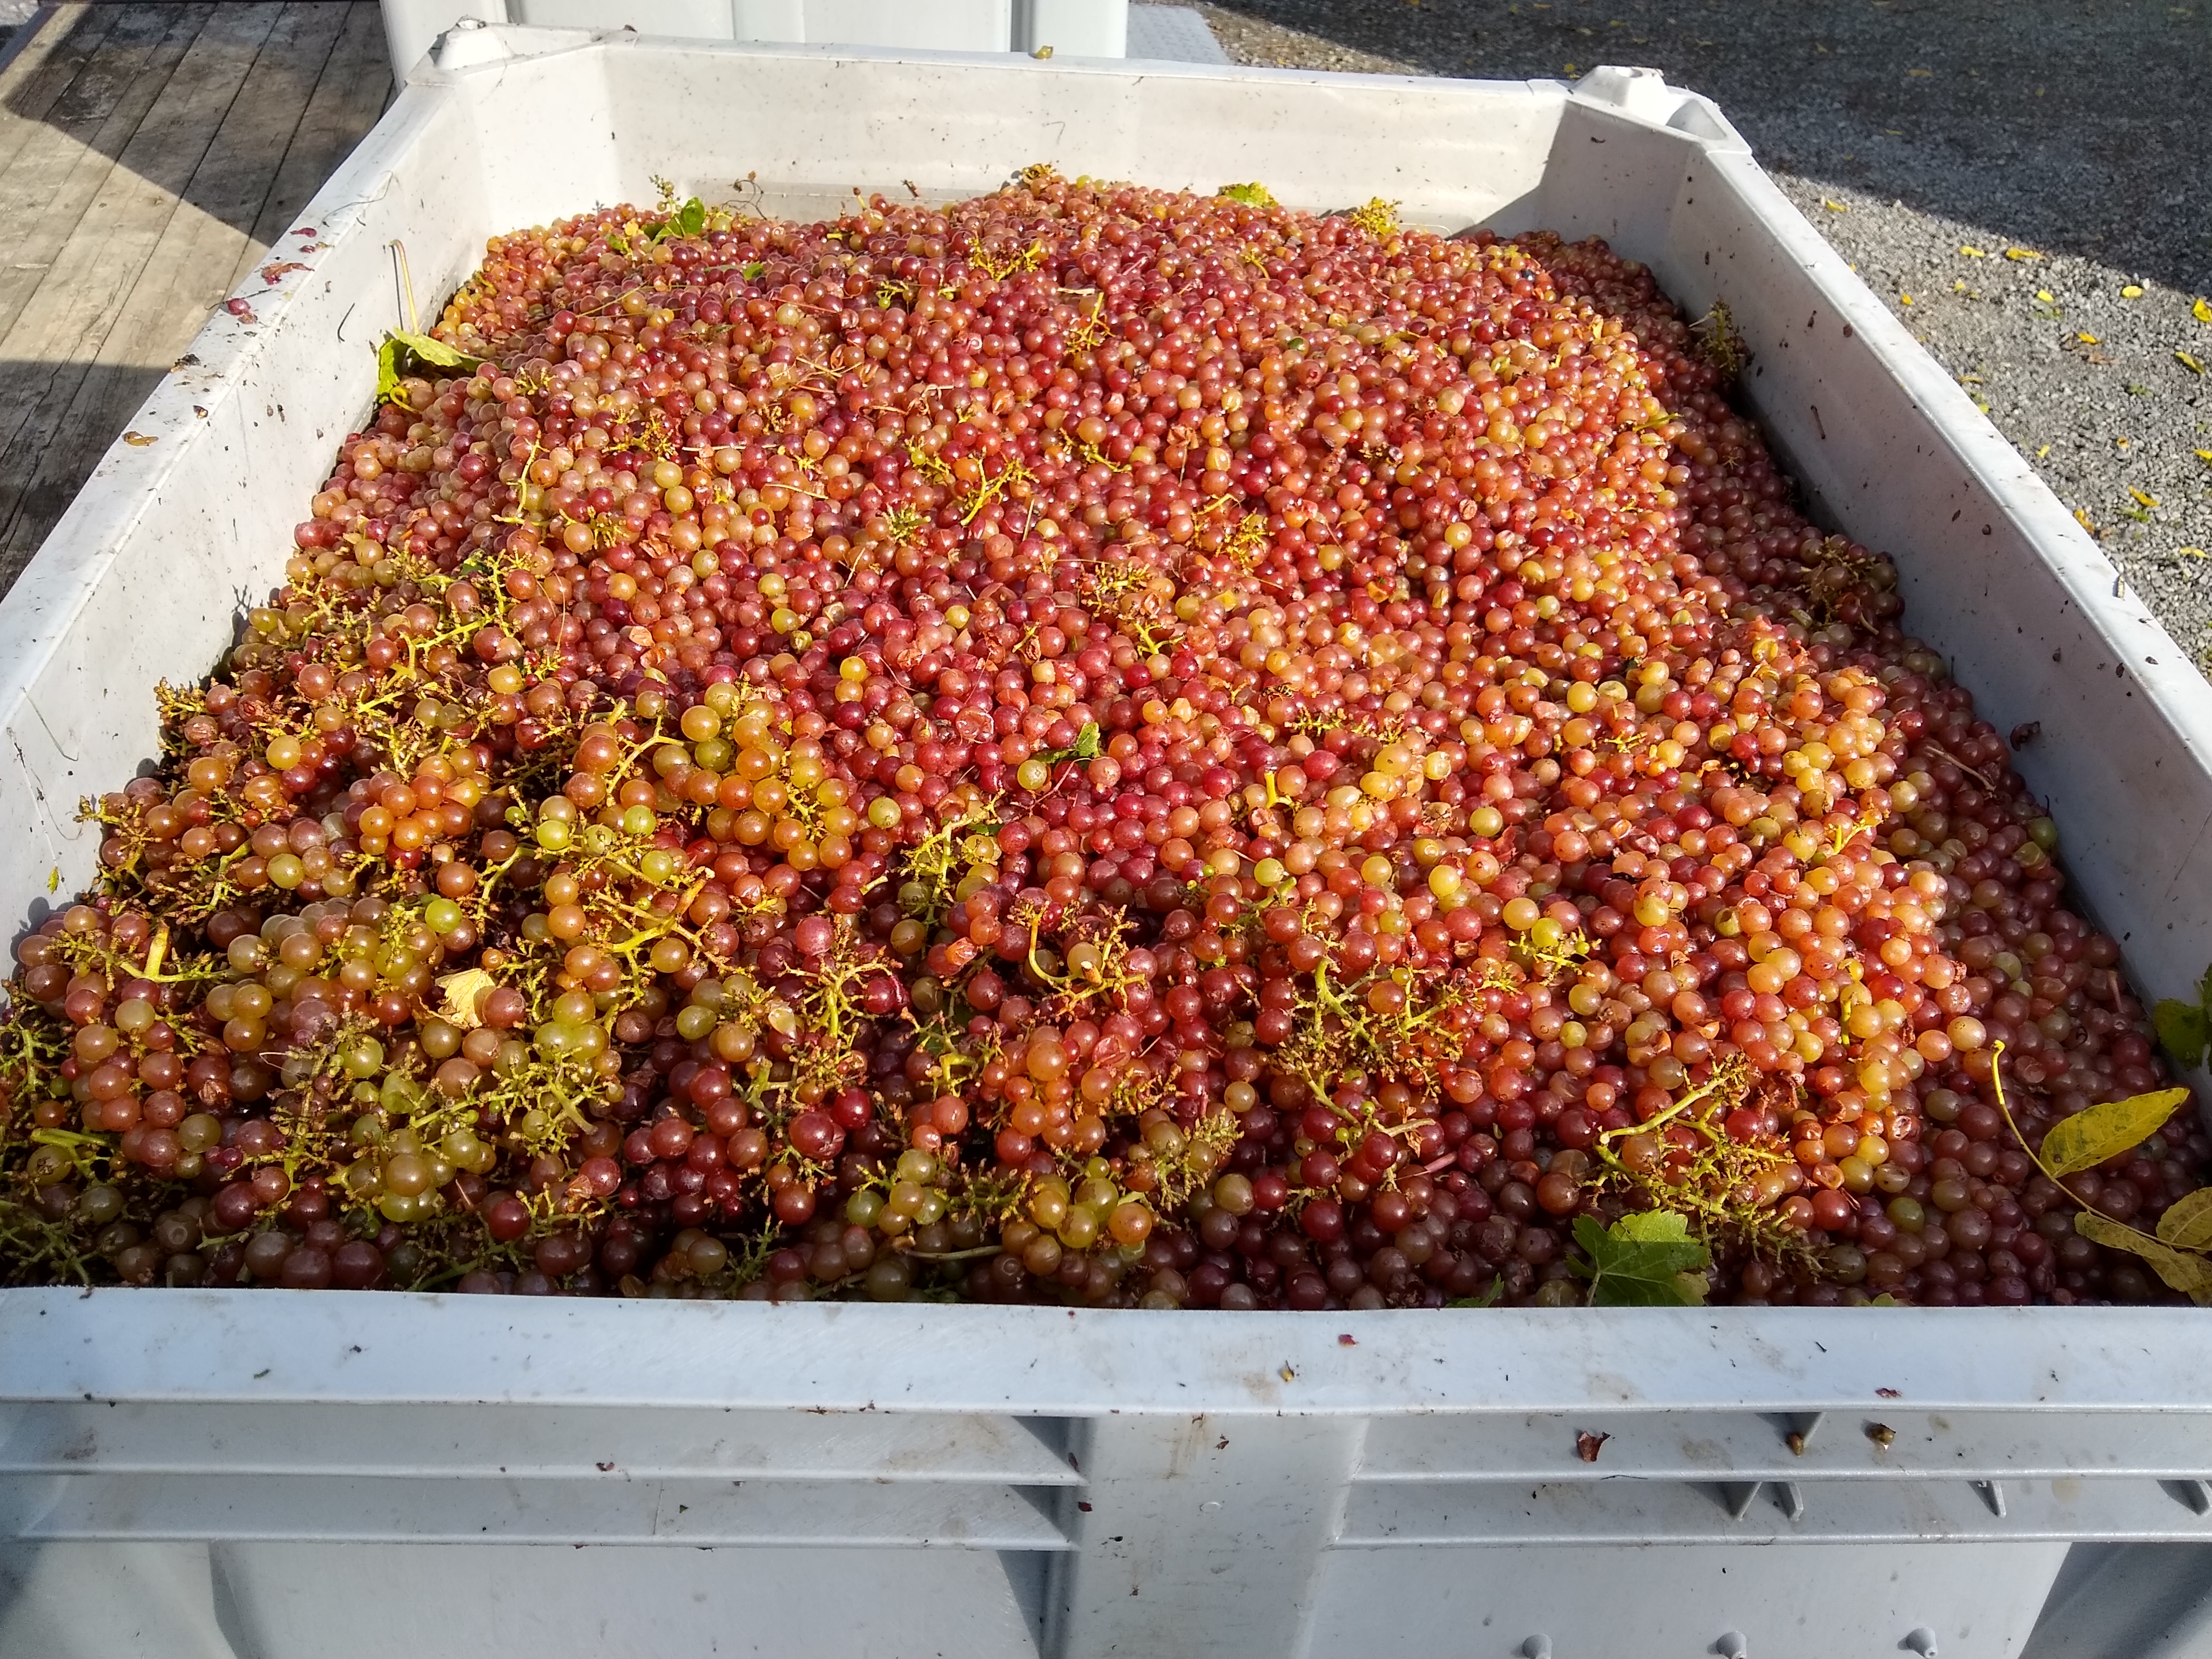 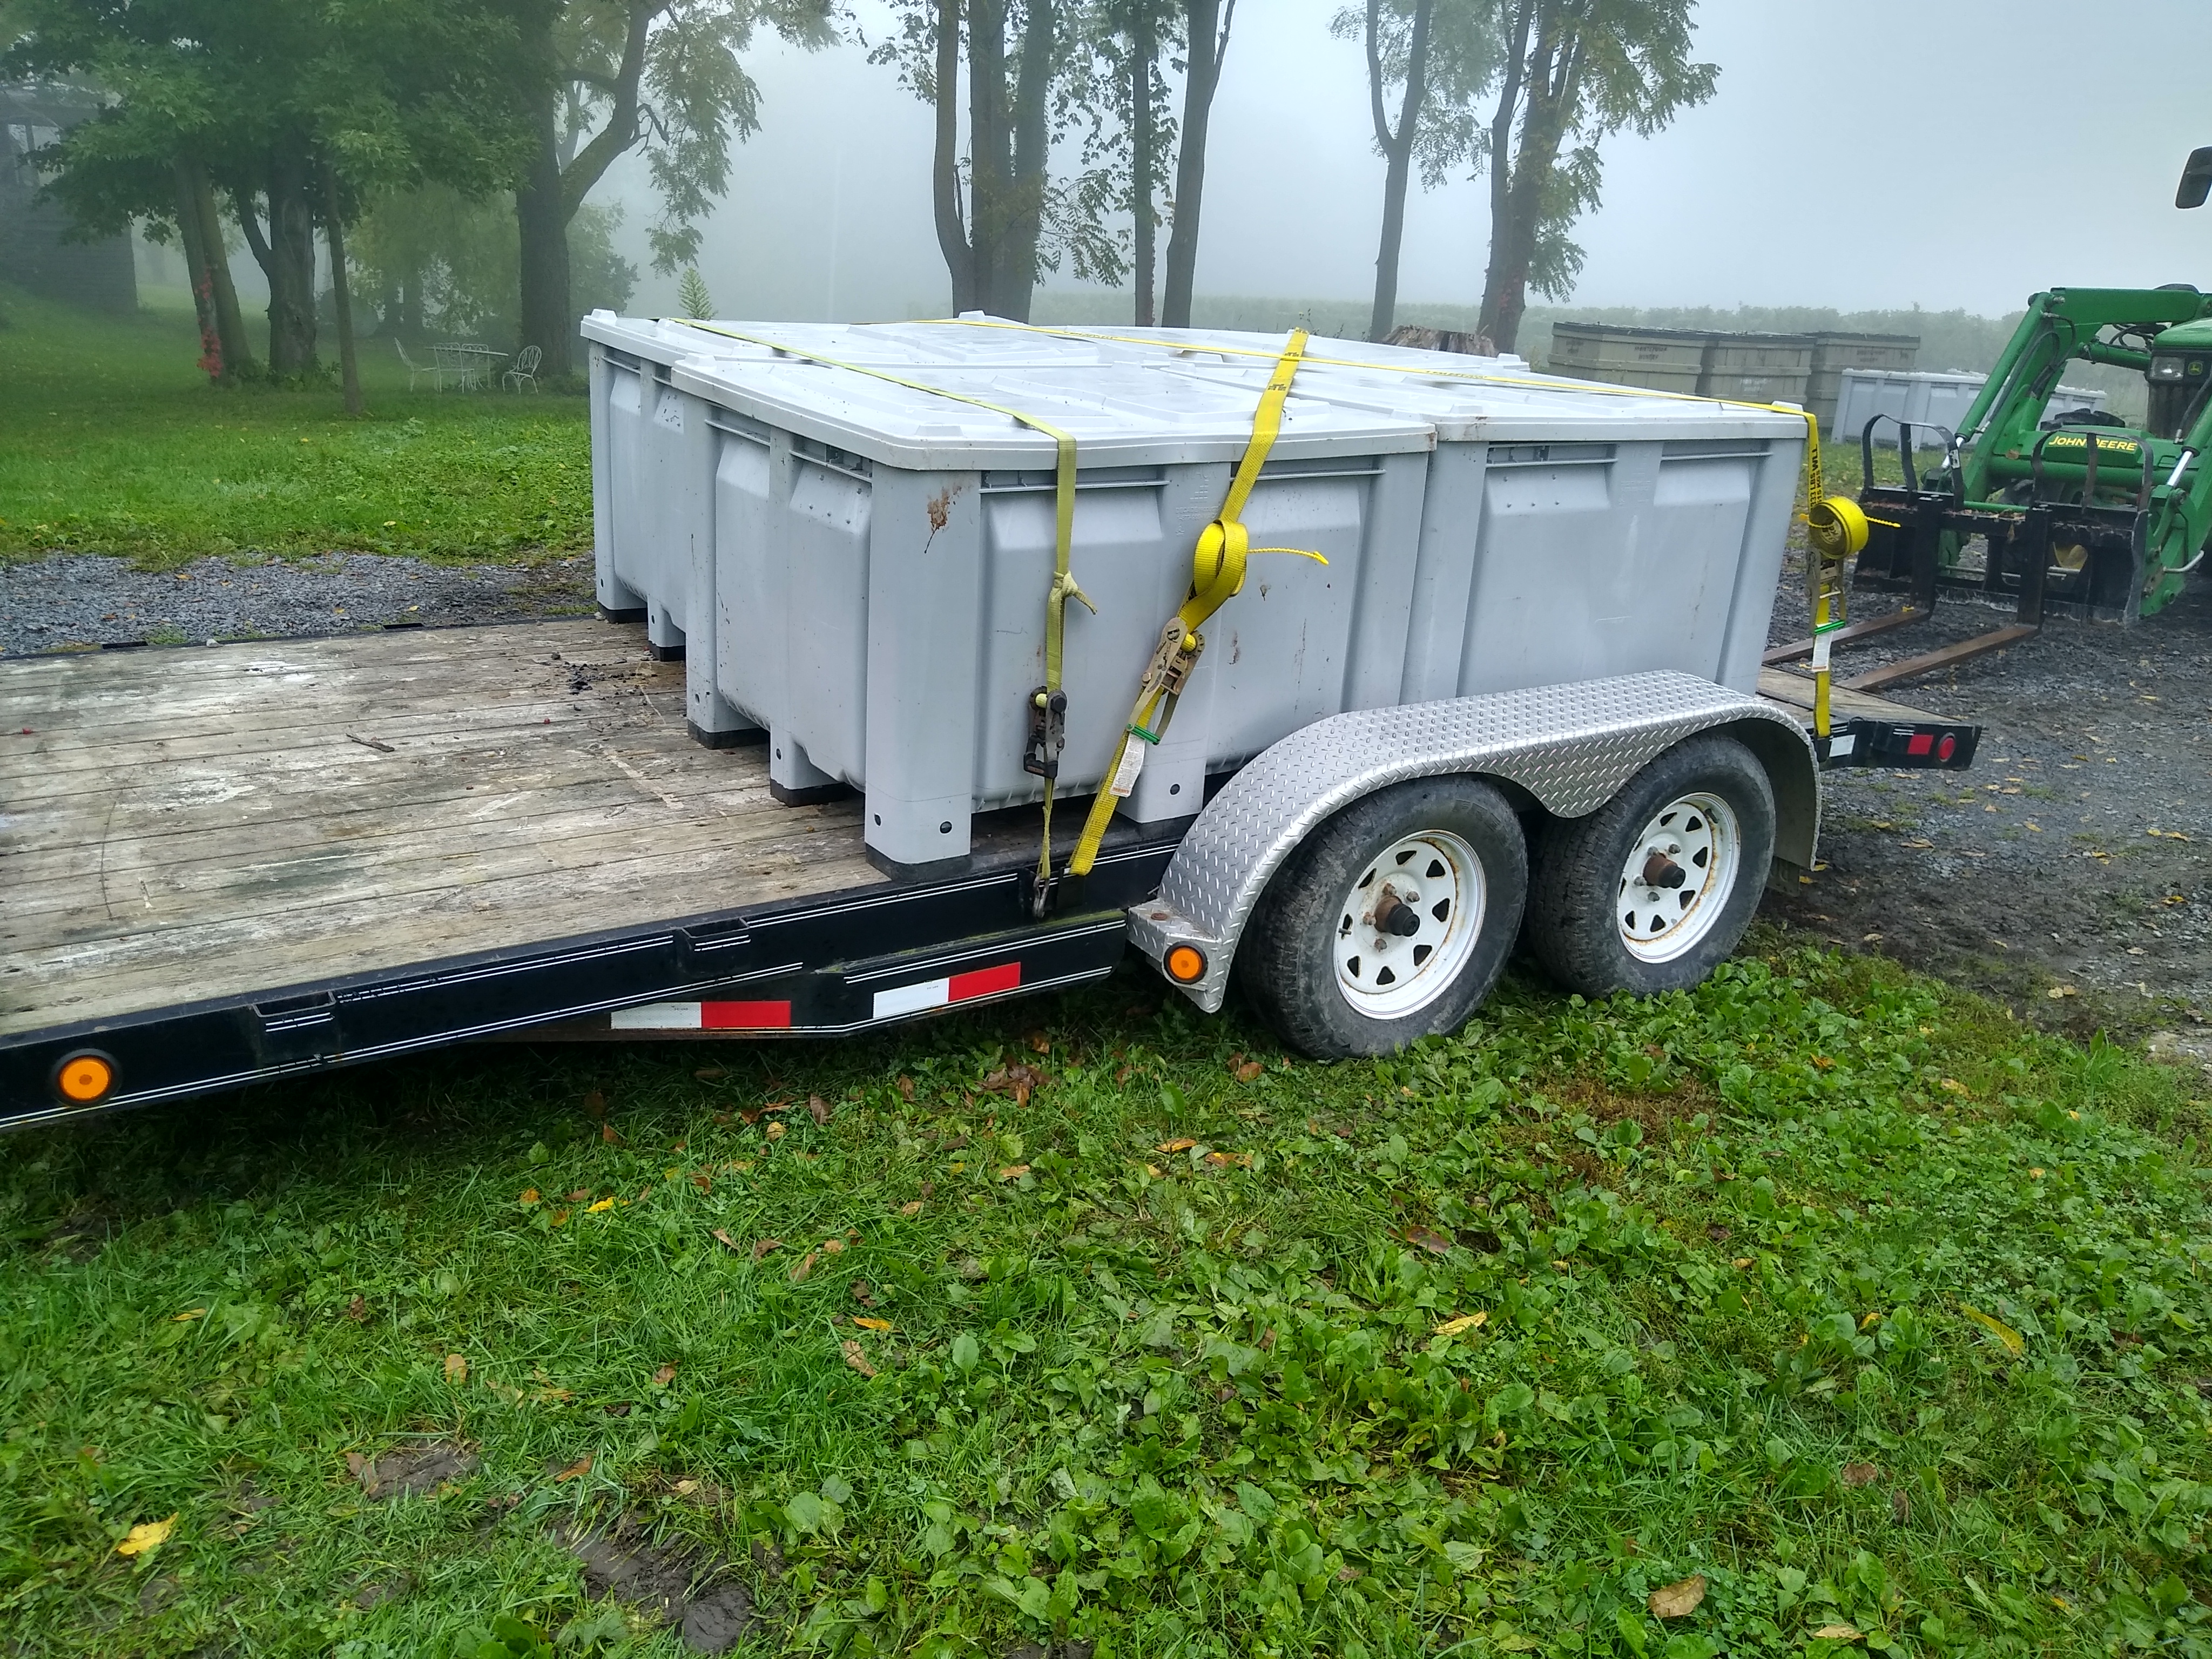 |
| Our 2021 Riesling harvest utilized a different (newer) harvester and associated equipment. This service is provided by Buttonwood Groves Winery. The harvester concept is basically the same as the work previously done by Hosmer Winery. The harvester shakes the vines, the berries fall into the harvester. But instead of the fruit being moved into a large bin pulled on a trailer in the next row, with this harvester the berries are collected in two large bins on the harvester. When reaching the end of the row, when the bins are full enough that another row won’t fit, the bins are tipped up to transfer the fruit into a transport wagon (they call it a gondola). While the harvester goes on to harvest more, the gondola is pulled by a tractor to where large bins (to transport the fruit to the winery for pressing etc.) are waiting on a trailer. The gondola bin is raised and tilted hydraulically to transfer the fruit into those bins. The gondola then goes back to get another load from the harvester. This method expedites the overall harvesting process, and this harvester removes more unwanted material such as leaves, small pieces of vines, etc. directly during the harvest process. | |
Pressing |
|
| After transporting the bins to the winery, each bin is weighed and then the grapes are lowered into an elevator that moves them into the press, where the juice is extracted, collected in a tank, and moved into the fermentation tanks. | |
Hilling Up and Hilling Down |
|
| After harvest, and before the ground gets hard due to frost, a ridge of dirt is placed over the graft union. The traditional ‘vinifera’ vines/grapes (the familiar, or maybe not familiar names like Riesling, Cabernet Franc, Lemberger, etc. – grown in Europe for centuries) are all grafted onto native American vine roots. There is a disease in our soils (and some even in Europe) that will harm (even kill) the vinifera varieties if planted with their own roots. The graft union, which is about 1-2” above the ground, is covered with 4-6” of dirt to provide protection from temperatures below around 0 degrees F during the winter. This is called ‘hilling up’. And in the spring the dirt must by ‘hilled down’. If the graft union is left underground, the grafted vinifera vine will send out roots … thus negating the whole reason for the grafting.
The extension video shows some methods for this work. The other video is one method I use to hill up.. |
|